
Wood is a versatile and timeless material that adds warmth and character to any space. If you're looking to add a unique touch to your home, DIY wood decor projects are a perfect way to showcase your creativity. From picture holders to rustic candle holders, there are endless possibilities when it comes to working with wood. In this article, we'll explore 15 creative DIY wood decor projects that will elevate your home decor game.
Also Read: Diy Projects for Home Decor
DIY Wood Projects Overview
Discover 5 DIY wood projects for home decor.- Learn to make wooden picture holders, ring wall hanging, painted birch slice coasters, wooden arrows, and wooden picture frames.
- Get ideas for creative and practical home decor using wood.
1. DIY Wooden Picture Holders
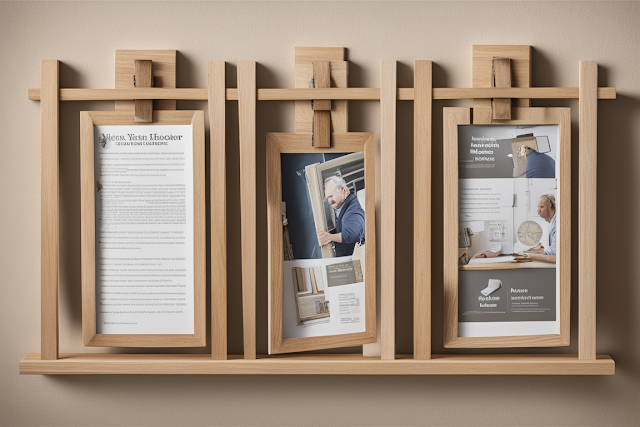
One of the easiest and most charming DIY wood decor projects is making wooden picture holders. All you need is a small block of wood and a bulldog clip. Start by sanding the block of wood to create a smooth surface. Then, attach the bulldog clip to the top of the block using wood glue or a small screw. Once the glue is dry and secure, you can insert your favorite photos or artwork into the clip. These wooden picture holders are not only functional but also add a rustic touch to any room.
Insider Tip: "When selecting the wood for your picture holders, consider using reclaimed wood for a more eco-friendly and unique look. You can find reclaimed wood at salvage yards or repurpose old furniture or pallets." - Jane, DIY enthusiast
2. DIY Wooden Ring Wall Hanging
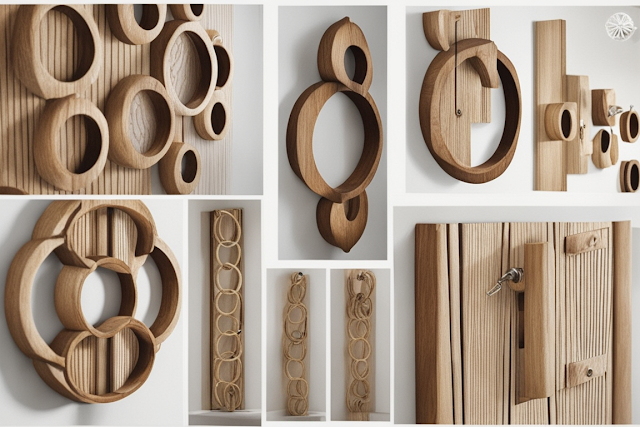
If you're looking to add a bohemian touch to your wall decor, try making a DIY wooden ring wall hanging. Start by selecting a wooden embroidery hoop or a wooden curtain ring. Then, wrap the ring with yarn or twine, securing it with glue at the beginning and end. Next, attach various lengths of yarn or twine to the bottom of the ring, creating a cascading effect. Finally, embellish the hanging with feathers, beads, or other decorative elements. Hang your wooden ring wall hanging on a hook or nail, and enjoy the boho vibes it brings to your space.
Insider Tip: "Experiment with different colors and textures of yarn to create a unique and personalized wall hanging. You can also incorporate different materials like ribbons or lace for added interest." - Sarah, Interior Designer
3. DIY Painted Birch Slice Coasters
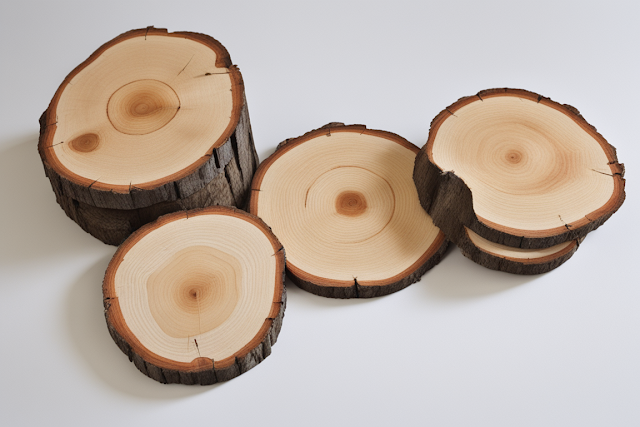
Birch slices are a popular choice for DIY wood decor projects due to their natural beauty. To make painted birch slice coasters, start by cutting birch logs into thin slices using a saw. Sand the slices to create a smooth surface. Then, apply a layer of clear varnish to protect the wood. Once the varnish is dry, you can get creative with paint. Use acrylic paints to create unique designs, such as abstract patterns or nature-inspired motifs. Finish the coasters with a coat of clear varnish to seal the paint. These painted birch slice coasters not only protect your surfaces but also add a touch of rustic charm to your home.
Insider Tip: "To make your coasters more durable, consider adding a layer of epoxy resin. This will give them a glossy finish and make them waterproof." - Mark, Woodworking Expert
Also Read: Diy Home Decor Projects on a Budget
4. DIY Wooden Arrows
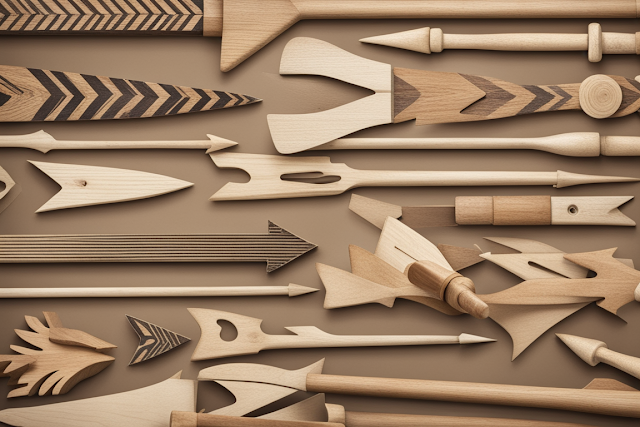
Wooden arrows are a trendy and versatile decor element that can be used in various ways. To make DIY wooden arrows, start by cutting thin wooden boards into arrow shapes using a saw. Sand the edges to create a smooth finish. Next, paint the arrows in your desired colors or stain them to enhance the natural wood grain. You can also add decorative elements like feathers or metal accents to personalize your arrows. Hang them on the wall, use them as shelf brackets, or incorporate them into a gallery wall for a unique and eye-catching display.
Insider Tip: "If you want to create a distressed or vintage look, lightly sand the painted arrows after they dry. This will give them a weathered appearance." - Lisa, Home Decor Blogger
5. DIY Wooden Picture Frame
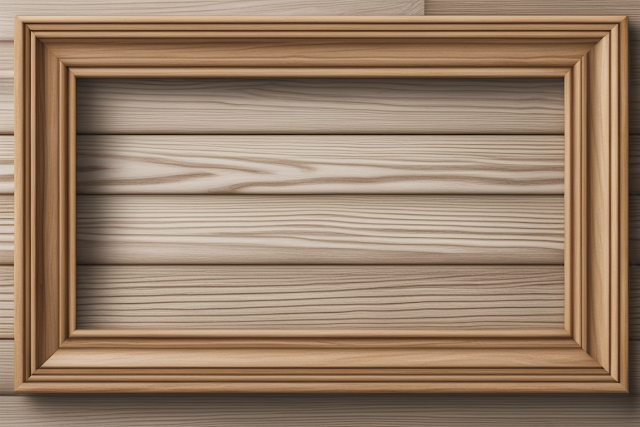
A DIY wooden picture frame adds a touch of elegance and sophistication to your favorite photos or artwork. To make a wooden picture frame, start by cutting four pieces of wood to your desired frame size. Use a miter saw or a miter box and hand saw to create 45-degree angles at each corner. Apply wood glue to the joints and secure them with clamps until the glue dries. Once the frame is assembled, you can sand it to create a smooth finish. Finally, you can leave the wood natural or apply paint or stain to match your decor. Insert your photo or artwork into the frame and display it proudly on a wall or tabletop.
Insider Tip: "If you want to add a personal touch to your wooden picture frame, consider wood burning a design or initials onto the frame. Wood burning kits are readily available and easy to use." - Alex, Woodworking Enthusiast
6. DIY Scrap Plywood Wall Clock
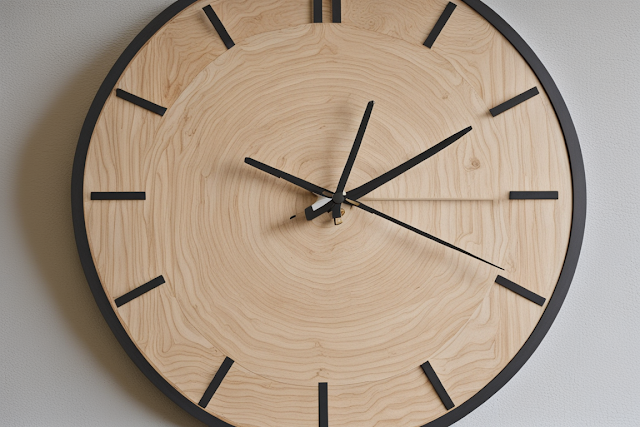
If you have leftover scrap plywood lying around, why not turn it into a stylish wall clock? To make a DIY scrap plywood wall clock, start by cutting a circle or any other shape from the plywood using a jigsaw. Sand the edges to create a smooth surface. Next, attach a clock mechanism to the center of the plywood using the provided hardware. Finally, you can leave the plywood natural or paint it in your desired color. Hang your scrap plywood wall clock on the wall, and you'll have a functional and unique piece of decor.
Insider Tip: "To add a modern twist to your scrap plywood wall clock, consider using metallic or neon paint. This will give it a contemporary and eye-catching look." - Emma, Interior Designer
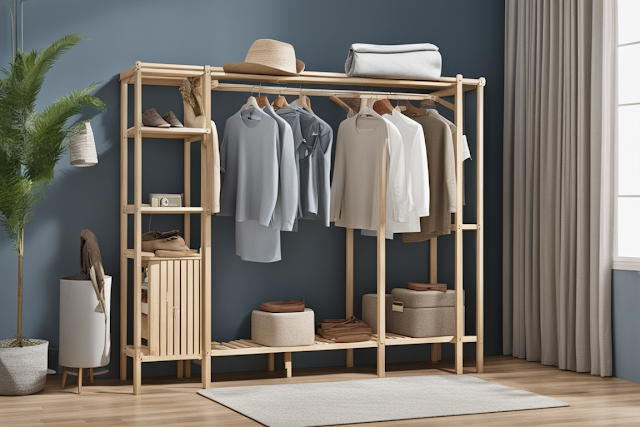
Case Study: The DIY Wooden Clothes Rack
At the age of 26, Sarah moved into a small apartment and quickly realized she needed a solution for her limited closet space. She stumbled upon a DIY wooden clothes rack tutorial and decided to give it a try.
Sarah gathered her materials - a wooden dowel, rope, and a few hooks - and got to work. With the help of her friend Alex, they measured and cut the dowel to the desired length, drilled holes on either end, and threaded the rope through. They secured the ends of the rope to the wall with the hooks, creating a simple and functional clothes rack.
Sarah was amazed at how easy and affordable it was to create her own clothes rack. Not only did it solve her storage problem, but it also added a touch of rustic charm to her apartment. She proudly hung her favorite clothes on the rack, transforming it into a decorative focal point.
Over time, Sarah discovered that her DIY clothes rack was not only useful for hanging clothes but also served as a creative way to display her accessories. She added small baskets and hooks to hold scarves, hats, and even her collection of statement necklaces.
Sarah's DIY project not only solved her storage issue but also sparked her interest in woodworking. She continued to explore other DIY wood projects, such as a wooden picture frame and a reclaimed wood flag. The satisfaction she gained from creating something with her own hands was immeasurable.
Through her experience with the DIY wooden clothes rack, Sarah learned that woodworking doesn't have to be intimidating. With a little creativity and determination, anyone can transform simple materials into functional and stylish home decor.
If you're in need of some extra storage space for your clothes, a DIY wooden clothes rack is a quick and easy solution. To make a wooden clothes rack, start by cutting a wooden dowel to your desired length. Then, use two wooden blocks or brackets to create a base for the dowel. Attach the blocks or brackets to the wall or floor using screws or adhesive. Finally, insert the dowel into the blocks or brackets, and you'll have a simple and functional clothes rack. This DIY project takes less than 15 minutes to complete and can be a great addition to your bedroom or laundry room.
Insider Tip: "If you want to add a touch of creativity to your wooden clothes rack, consider painting the dowel in a bold color or wrapping it with twine for a rustic look." - Michael, DIY Enthusiast
A circle wood shelf is a unique and stylish way to display small decor items or create a focal point on your wall. To make a DIY circle wood shelf, start by cutting a circular piece of plywood or MDF using a jigsaw. Sand the edges to create a smooth finish. Next, cut a smaller circle from the center of the larger circle to create the shelf. Sand the edges of the smaller circle as well. Attach a wooden bracket or cleat to the back of the larger circle for wall mounting. Finally, you can leave the wood natural or paint it in your desired color. Hang your circle wood shelf on the wall, and you'll have a functional and visually appealing display.
Insider Tip: "To create a floating effect for your circle wood shelf, consider using invisible brackets or mounting it with strong adhesive. This will give the shelf a clean and modern look." - Jessica, Interior Designer
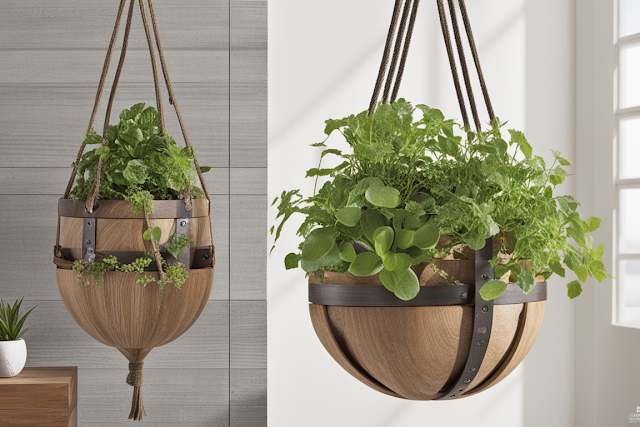
Bringing nature indoors is always a good idea, and a DIY hanging planter is a perfect way to do it. To make a wooden hanging planter, start by cutting a wooden board into your desired planter shape using a saw. Sand the edges to create a smooth surface. Next, attach a length of rope or chain to each corner of the planter using screws or eye hooks. Make sure the ropes or chains are securely fastened. Finally, add your favorite plants or succulents to the planter, and hang it from a hook or ceiling. This DIY hanging planter will not only add greenery to your space but also serve as a decorative element.
Insider Tip: "If you're short on space, consider making a vertical hanging planter using multiple wooden boards. This will allow you to maximize your plant collection without taking up too much floor or shelf space." - Rachel, Gardening Expert
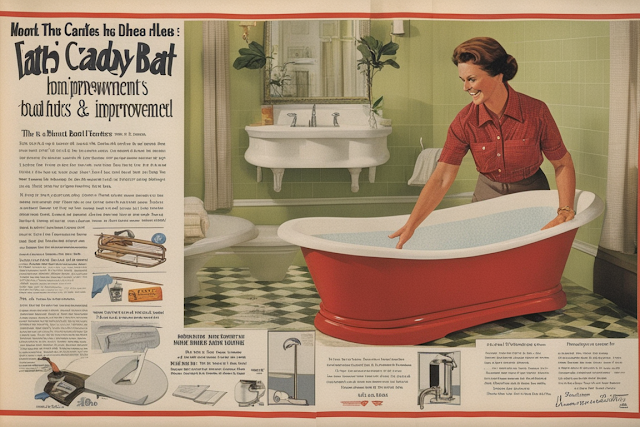
Create the ultimate relaxation experience with a DIY wooden bath caddy. To make a bath caddy, start by measuring the width of your bathtub. Cut a wooden board to that length, ensuring it's wide enough to accommodate a book, a glass of wine, or any other bath essentials. Sand the edges of the board to create a smooth finish. Next, attach two wooden dowels on either side of the board to create handles. Finally, you can leave the wood natural or apply a waterproof sealant for added protection. Place your bath caddy across the bathtub, and enjoy a luxurious and convenient bathing experience.
Insider Tip: "To prevent your bath caddy from slipping or scratching the bathtub, consider adding rubber tips or adhesive pads to the bottom of the dowels." - Laura, DIY Enthusiast
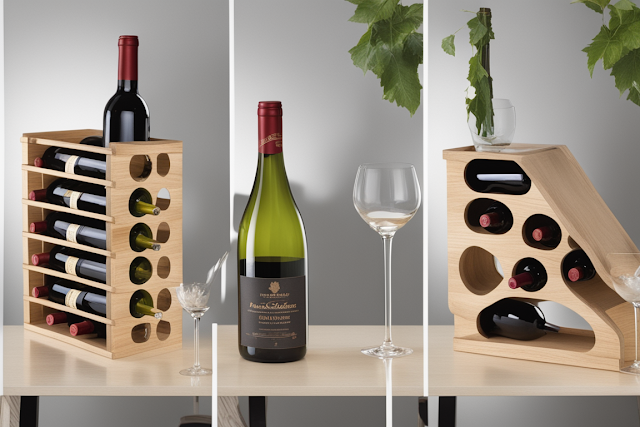
For wine enthusiasts, a DIY holder for a wine bottle and glasses is a must-have accessory. To make a wine bottle and glasses holder, start by cutting a wooden board to your desired length. Sand the edges to create a smooth surface. Next, measure and mark the locations for the wine bottle and glass holders on the board. Use a drill and a hole saw attachment to create the holes for the bottle and glasses. Sand the inside edges of the holes to remove any roughness. Finally, you can leave the wood natural or apply paint or stain to match your decor. Place your wine bottle and glasses in the holder, and you'll have a stylish and functional addition to your dining or entertainment area.
Insider Tip: "To add a touch of elegance to your wine bottle and glasses holder, consider adding decorative elements like metal accents or engraved initials. This will make it a truly personalized piece." - John, Wine Connoisseur
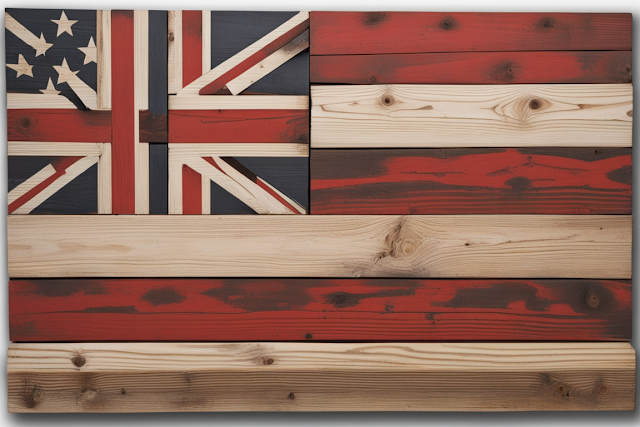
Show your patriotic spirit with a DIY reclaimed wood flag. To make a reclaimed wood flag, start by cutting wooden boards into equal lengths. Sand the edges to create a smooth finish. Next, arrange the boards horizontally, leaving a small gap between each one to represent the white stripes. Attach them together using wood glue and nails or screws. Once the flag base is assembled, you can paint it in the classic red, white, and blue colors or get creative with different shades and patterns. Finally, you can leave the wood natural or distress it to achieve a weathered look. Hang your reclaimed wood flag on a wall or display it on a mantel for a patriotic statement piece.
Insider Tip: "For a vintage-inspired look, consider using reclaimed barn wood or pallet wood for your flag. The aged and weathered appearance will add character and charm." - Emily, DIY Enthusiast
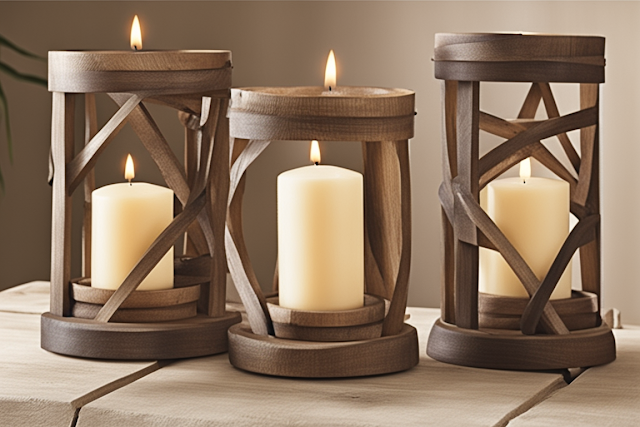
Create a cozy and inviting ambiance with a DIY rustic candle holder. To make a rustic candle holder, start by cutting a log or a thick branch into your desired length using a saw. Sand the top surface to create a flat and even base for the candles. Next, drill holes into the top surface of the log or branch, ensuring they're wide and deep enough to hold tea lights or votive candles. Sand the edges of the holes to remove any roughness. Finally, you can leave the wood natural or apply a clear varnish or stain for added protection. Light the candles and enjoy the warm glow and natural beauty of your rustic candle holder.
Insider Tip: "To create a cohesive look, consider making multiple rustic candle holders in different heights and sizes. Group them together on a coffee table or mantel for a stunning centerpiece." - Megan, Interior Designer
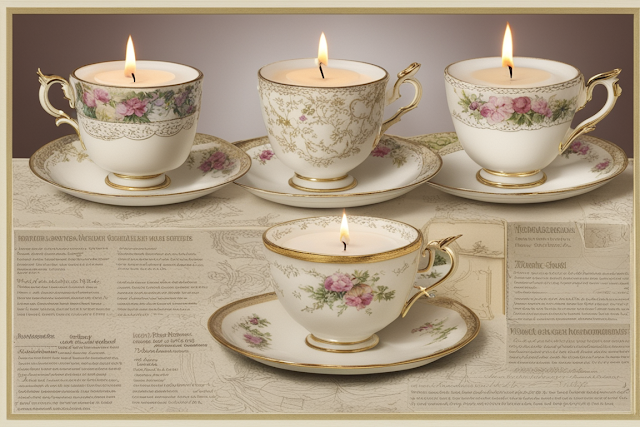
Repurpose old teacups into charming and fragrant candles with a DIY teacup candle project. To make teacup candles, start by selecting teacups or coffee mugs that you no longer use or find at thrift stores. Melt candle wax in a double boiler or a microwave-safe container, following the instructions on the wax packaging. Once the wax is melted, add your desired fragrance and pour it into the teacups, leaving a small space at the top. Insert a candle wick into the center of the wax, ensuring it stands upright. Let the wax cool and solidify. Trim the wick to the desired length, and your teacup candles are ready to light up any room with their whimsical charm.
Insider Tip: "For a more decorative touch, consider adding dried flowers, herbs, or glitter to the melted wax before pouring it into the teacups. This will create a unique and visually appealing candle." - Kate, Candle Making Expert

Pallet plaques are a trendy and rustic way to display quotes, artwork, or family names. To make DIY pallet plaques, start by dismantling a wooden pallet using a pry bar or a saw. Sand the pallet boards to remove any roughness or splinters. Next, cut the boards to your desired plaque size using a saw. Sand the edges to create a smooth finish. You can leave the wood natural or apply paint or stain to achieve your desired look. Finally, add your chosen quote or artwork using stencils, vinyl decals, or freehand painting. Hang your pallet plaques on the wall, and you'll have a personalized and visually striking decor piece.
Insider Tip: "To give your pallet plaques a vintage or distressed look, lightly sand the painted or stained surface after it dries. This will create a worn appearance." - Olivia, DIY Enthusiast
In conclusion, DIY wood decor projects offer a fantastic opportunity to showcase your creativity and add a unique touch to your home. Whether you're a seasoned DIY enthusiast or just starting out, these 15 creative wood decor projects are sure to inspire you. From wooden picture holders to pallet plaques, there's something for every style and skill level. So grab your tools, unleash your imagination, and get ready to transform your space with these beautiful and functional DIY wood decor projects.
At the age of 26, Sarah moved into a small apartment and quickly realized she needed a solution for her limited closet space. She stumbled upon a DIY wooden clothes rack tutorial and decided to give it a try.
Sarah gathered her materials - a wooden dowel, rope, and a few hooks - and got to work. With the help of her friend Alex, they measured and cut the dowel to the desired length, drilled holes on either end, and threaded the rope through. They secured the ends of the rope to the wall with the hooks, creating a simple and functional clothes rack.
Sarah was amazed at how easy and affordable it was to create her own clothes rack. Not only did it solve her storage problem, but it also added a touch of rustic charm to her apartment. She proudly hung her favorite clothes on the rack, transforming it into a decorative focal point.
Over time, Sarah discovered that her DIY clothes rack was not only useful for hanging clothes but also served as a creative way to display her accessories. She added small baskets and hooks to hold scarves, hats, and even her collection of statement necklaces.
Sarah's DIY project not only solved her storage issue but also sparked her interest in woodworking. She continued to explore other DIY wood projects, such as a wooden picture frame and a reclaimed wood flag. The satisfaction she gained from creating something with her own hands was immeasurable.
Through her experience with the DIY wooden clothes rack, Sarah learned that woodworking doesn't have to be intimidating. With a little creativity and determination, anyone can transform simple materials into functional and stylish home decor.
7. DIY Wooden Clothes Rack in Under 15 Minutes
If you're in need of some extra storage space for your clothes, a DIY wooden clothes rack is a quick and easy solution. To make a wooden clothes rack, start by cutting a wooden dowel to your desired length. Then, use two wooden blocks or brackets to create a base for the dowel. Attach the blocks or brackets to the wall or floor using screws or adhesive. Finally, insert the dowel into the blocks or brackets, and you'll have a simple and functional clothes rack. This DIY project takes less than 15 minutes to complete and can be a great addition to your bedroom or laundry room.
Insider Tip: "If you want to add a touch of creativity to your wooden clothes rack, consider painting the dowel in a bold color or wrapping it with twine for a rustic look." - Michael, DIY Enthusiast
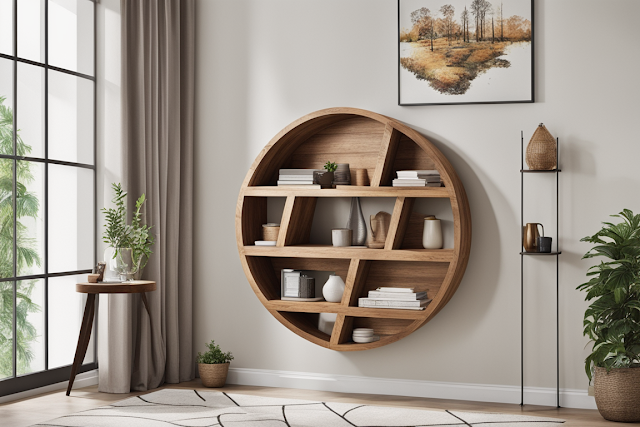
8. DIY Circle Wood Shelf
A circle wood shelf is a unique and stylish way to display small decor items or create a focal point on your wall. To make a DIY circle wood shelf, start by cutting a circular piece of plywood or MDF using a jigsaw. Sand the edges to create a smooth finish. Next, cut a smaller circle from the center of the larger circle to create the shelf. Sand the edges of the smaller circle as well. Attach a wooden bracket or cleat to the back of the larger circle for wall mounting. Finally, you can leave the wood natural or paint it in your desired color. Hang your circle wood shelf on the wall, and you'll have a functional and visually appealing display.
Insider Tip: "To create a floating effect for your circle wood shelf, consider using invisible brackets or mounting it with strong adhesive. This will give the shelf a clean and modern look." - Jessica, Interior Designer
9. DIY Hanging Planter
Bringing nature indoors is always a good idea, and a DIY hanging planter is a perfect way to do it. To make a wooden hanging planter, start by cutting a wooden board into your desired planter shape using a saw. Sand the edges to create a smooth surface. Next, attach a length of rope or chain to each corner of the planter using screws or eye hooks. Make sure the ropes or chains are securely fastened. Finally, add your favorite plants or succulents to the planter, and hang it from a hook or ceiling. This DIY hanging planter will not only add greenery to your space but also serve as a decorative element.
Insider Tip: "If you're short on space, consider making a vertical hanging planter using multiple wooden boards. This will allow you to maximize your plant collection without taking up too much floor or shelf space." - Rachel, Gardening Expert
10. DIY Bath Caddy
Create the ultimate relaxation experience with a DIY wooden bath caddy. To make a bath caddy, start by measuring the width of your bathtub. Cut a wooden board to that length, ensuring it's wide enough to accommodate a book, a glass of wine, or any other bath essentials. Sand the edges of the board to create a smooth finish. Next, attach two wooden dowels on either side of the board to create handles. Finally, you can leave the wood natural or apply a waterproof sealant for added protection. Place your bath caddy across the bathtub, and enjoy a luxurious and convenient bathing experience.
Insider Tip: "To prevent your bath caddy from slipping or scratching the bathtub, consider adding rubber tips or adhesive pads to the bottom of the dowels." - Laura, DIY Enthusiast
11. DIY Holder for Wine Bottle and Glasses
For wine enthusiasts, a DIY holder for a wine bottle and glasses is a must-have accessory. To make a wine bottle and glasses holder, start by cutting a wooden board to your desired length. Sand the edges to create a smooth surface. Next, measure and mark the locations for the wine bottle and glass holders on the board. Use a drill and a hole saw attachment to create the holes for the bottle and glasses. Sand the inside edges of the holes to remove any roughness. Finally, you can leave the wood natural or apply paint or stain to match your decor. Place your wine bottle and glasses in the holder, and you'll have a stylish and functional addition to your dining or entertainment area.
Insider Tip: "To add a touch of elegance to your wine bottle and glasses holder, consider adding decorative elements like metal accents or engraved initials. This will make it a truly personalized piece." - John, Wine Connoisseur
12. DIY Reclaimed Wood Flag
Show your patriotic spirit with a DIY reclaimed wood flag. To make a reclaimed wood flag, start by cutting wooden boards into equal lengths. Sand the edges to create a smooth finish. Next, arrange the boards horizontally, leaving a small gap between each one to represent the white stripes. Attach them together using wood glue and nails or screws. Once the flag base is assembled, you can paint it in the classic red, white, and blue colors or get creative with different shades and patterns. Finally, you can leave the wood natural or distress it to achieve a weathered look. Hang your reclaimed wood flag on a wall or display it on a mantel for a patriotic statement piece.
Insider Tip: "For a vintage-inspired look, consider using reclaimed barn wood or pallet wood for your flag. The aged and weathered appearance will add character and charm." - Emily, DIY Enthusiast
13. DIY Rustic Candle Holder
Create a cozy and inviting ambiance with a DIY rustic candle holder. To make a rustic candle holder, start by cutting a log or a thick branch into your desired length using a saw. Sand the top surface to create a flat and even base for the candles. Next, drill holes into the top surface of the log or branch, ensuring they're wide and deep enough to hold tea lights or votive candles. Sand the edges of the holes to remove any roughness. Finally, you can leave the wood natural or apply a clear varnish or stain for added protection. Light the candles and enjoy the warm glow and natural beauty of your rustic candle holder.
Insider Tip: "To create a cohesive look, consider making multiple rustic candle holders in different heights and sizes. Group them together on a coffee table or mantel for a stunning centerpiece." - Megan, Interior Designer
14. DIY Teacup Candles
Repurpose old teacups into charming and fragrant candles with a DIY teacup candle project. To make teacup candles, start by selecting teacups or coffee mugs that you no longer use or find at thrift stores. Melt candle wax in a double boiler or a microwave-safe container, following the instructions on the wax packaging. Once the wax is melted, add your desired fragrance and pour it into the teacups, leaving a small space at the top. Insert a candle wick into the center of the wax, ensuring it stands upright. Let the wax cool and solidify. Trim the wick to the desired length, and your teacup candles are ready to light up any room with their whimsical charm.
Insider Tip: "For a more decorative touch, consider adding dried flowers, herbs, or glitter to the melted wax before pouring it into the teacups. This will create a unique and visually appealing candle." - Kate, Candle Making Expert
15. DIY Pallet Plaques
Pallet plaques are a trendy and rustic way to display quotes, artwork, or family names. To make DIY pallet plaques, start by dismantling a wooden pallet using a pry bar or a saw. Sand the pallet boards to remove any roughness or splinters. Next, cut the boards to your desired plaque size using a saw. Sand the edges to create a smooth finish. You can leave the wood natural or apply paint or stain to achieve your desired look. Finally, add your chosen quote or artwork using stencils, vinyl decals, or freehand painting. Hang your pallet plaques on the wall, and you'll have a personalized and visually striking decor piece.
Insider Tip: "To give your pallet plaques a vintage or distressed look, lightly sand the painted or stained surface after it dries. This will create a worn appearance." - Olivia, DIY Enthusiast
In conclusion, DIY wood decor projects offer a fantastic opportunity to showcase your creativity and add a unique touch to your home. Whether you're a seasoned DIY enthusiast or just starting out, these 15 creative wood decor projects are sure to inspire you. From wooden picture holders to pallet plaques, there's something for every style and skill level. So grab your tools, unleash your imagination, and get ready to transform your space with these beautiful and functional DIY wood decor projects.
Frequently Asked Questions
Q: Who can try 5 DIY home decor wood projects?
A: Anyone with an interest in home improvement can try these projects.Q: What are 5 DIY home decor wood projects?
A: These projects include making a wooden shelf, picture frames, and a serving tray.Q: How can I start 5 DIY home decor wood projects?
A: You can start by gathering the necessary tools and materials, then following online tutorials.
Comments
Post a Comment